
For a recent project, we were tasked with creating a series of virtual landscapes that were to be projected onto a stadium floor. Real drivers would navigate their way through roads positioned within our scenes. To give the sequence a sense of pace and make it feel as though the audience had been taken on a journey we needed to have the content projected under the cars animating and moving at a far greater speed than the drivers were doing on the stage. This presented an interesting challenge as we would have to calculate how best to determine this as well as devise a process to achieve the illusion.
Having previously worked on a project with similar requirements - The Fast and Furious Live, we were able to implement and build upon on a number of techniques we had developed throughout the production of the arena tour. A major limitation of the Fast and Furious Live setup was the number of cars that were required to be onstage at any given moment. There was no way to have the animation move in a way that would follow more than a single car at a time, unless they were moving in very tight unison. Luckily for our latest project these limitations were removed as only a single car would be onstage at a time. This allowed us to create much more tightly choreographed content that would precisely follow the driver's actions.
Our first goal, given the nature of live events, was to come up with a workflow that would allow for as much flexibility as possible, knowing that changes are often made right up to the last minute. This meant exploring new workflow techniques and moving away from the very linear pipeline we’d used on previous projects. We began looking into a more procedural approach that would let changes made high up in the pipeline, feed directly down the chain and visa versa.
For Fast and Furious Live we followed our traditional production pipeline; creating assets, blocking our animation, locking cameras and hero elements, then populating our scenes based on what is visible in the shot. But this approach leads to a very rigid setup with changes to previous steps requiring extensive man hours to implement. We wanted an approach that would provide more fluidity and allow us to make changes without having to re-do previously completed work.
We hoped that Houdini would be the best choice for us and we felt confident that, given some initial research and development time, we would be able to create a tool to streamline much of the workflow into a concise, procedural process.
Our next consideration was finding a way to output our content at a high resolution with as much speed as possible. We are always keen to test new ways to output our content, having used everything from Cinema 4D's Standard renderer, to Octane, Redshift and Arnold. For this we turned to gaming engines, with their instant interactive feedback and incredible rendering speed, to help us bring our landscapes to life. Specifically, we made use of Unreal Engine 4 which produced fantastic visual results at speeds far beyond anything in our standard toolset.
Car Paths
The general concept is simple, we have two paths as outlined below:
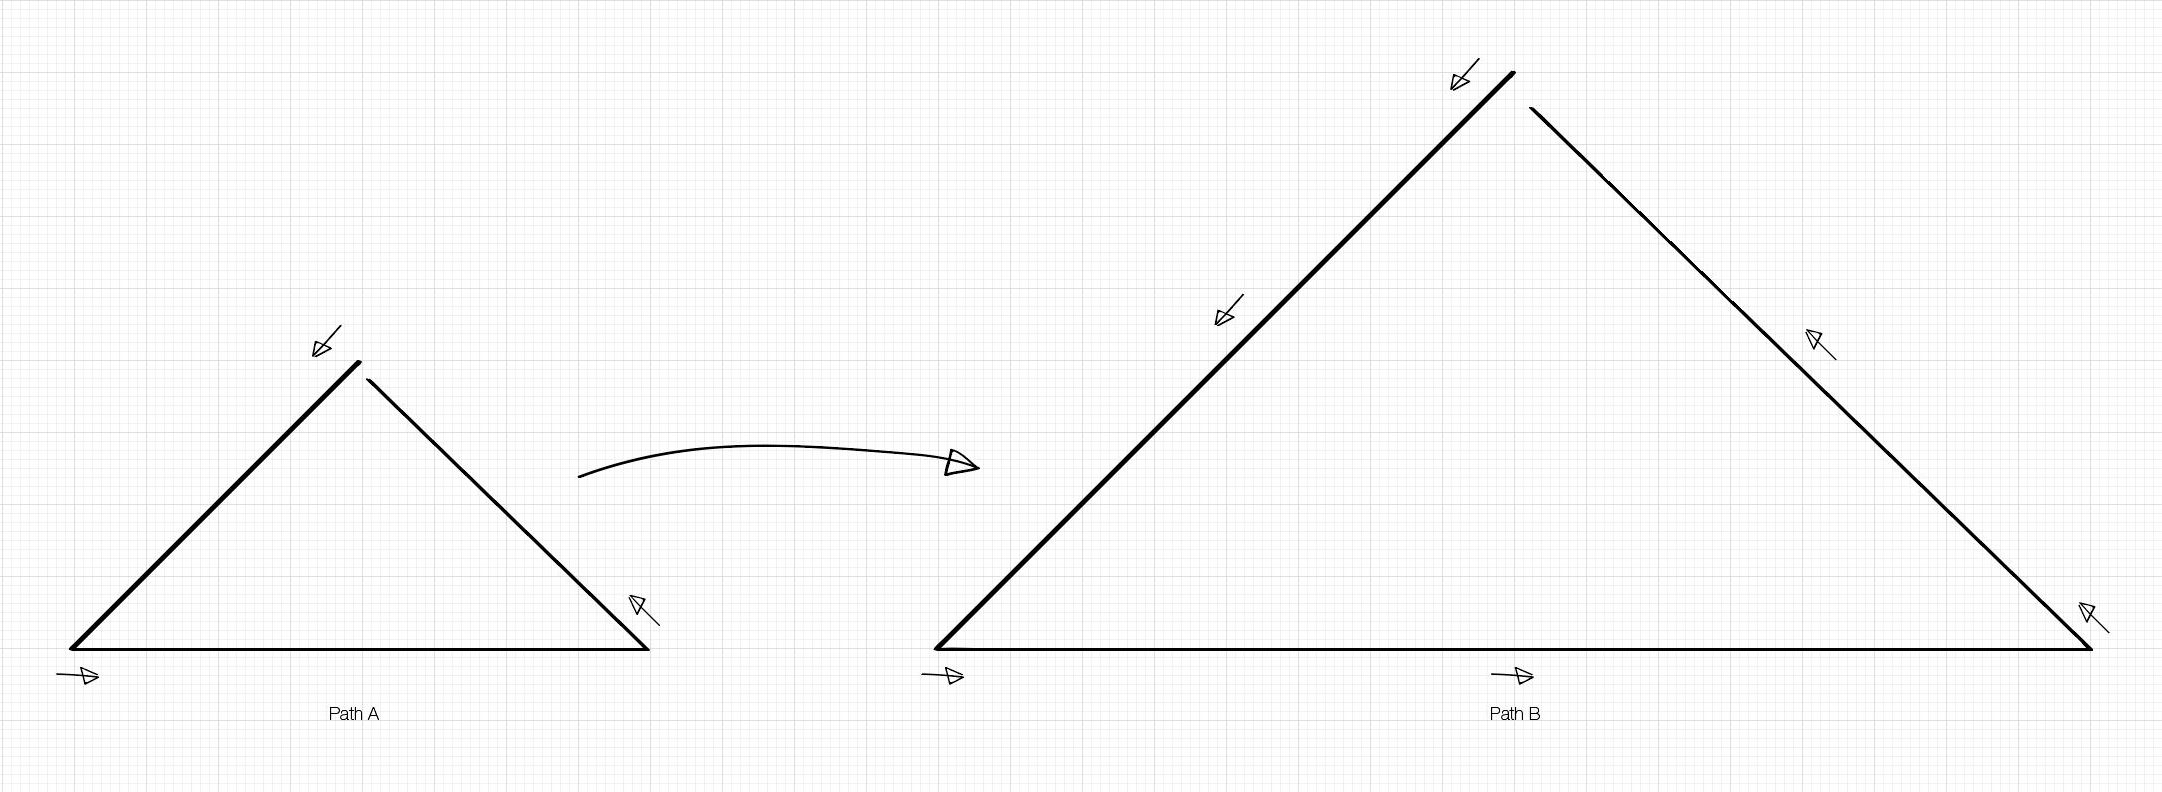
However, we wanted to be able to control certain aspects of this setup more accurately. For example, if we wanted the landscape to be moving slowly along the section with the red line (see below) and then quickly in the sections with the green line (also below) the actual shape of our landscape would need to be a warped version of Path A, not a literal copy as in the example above.
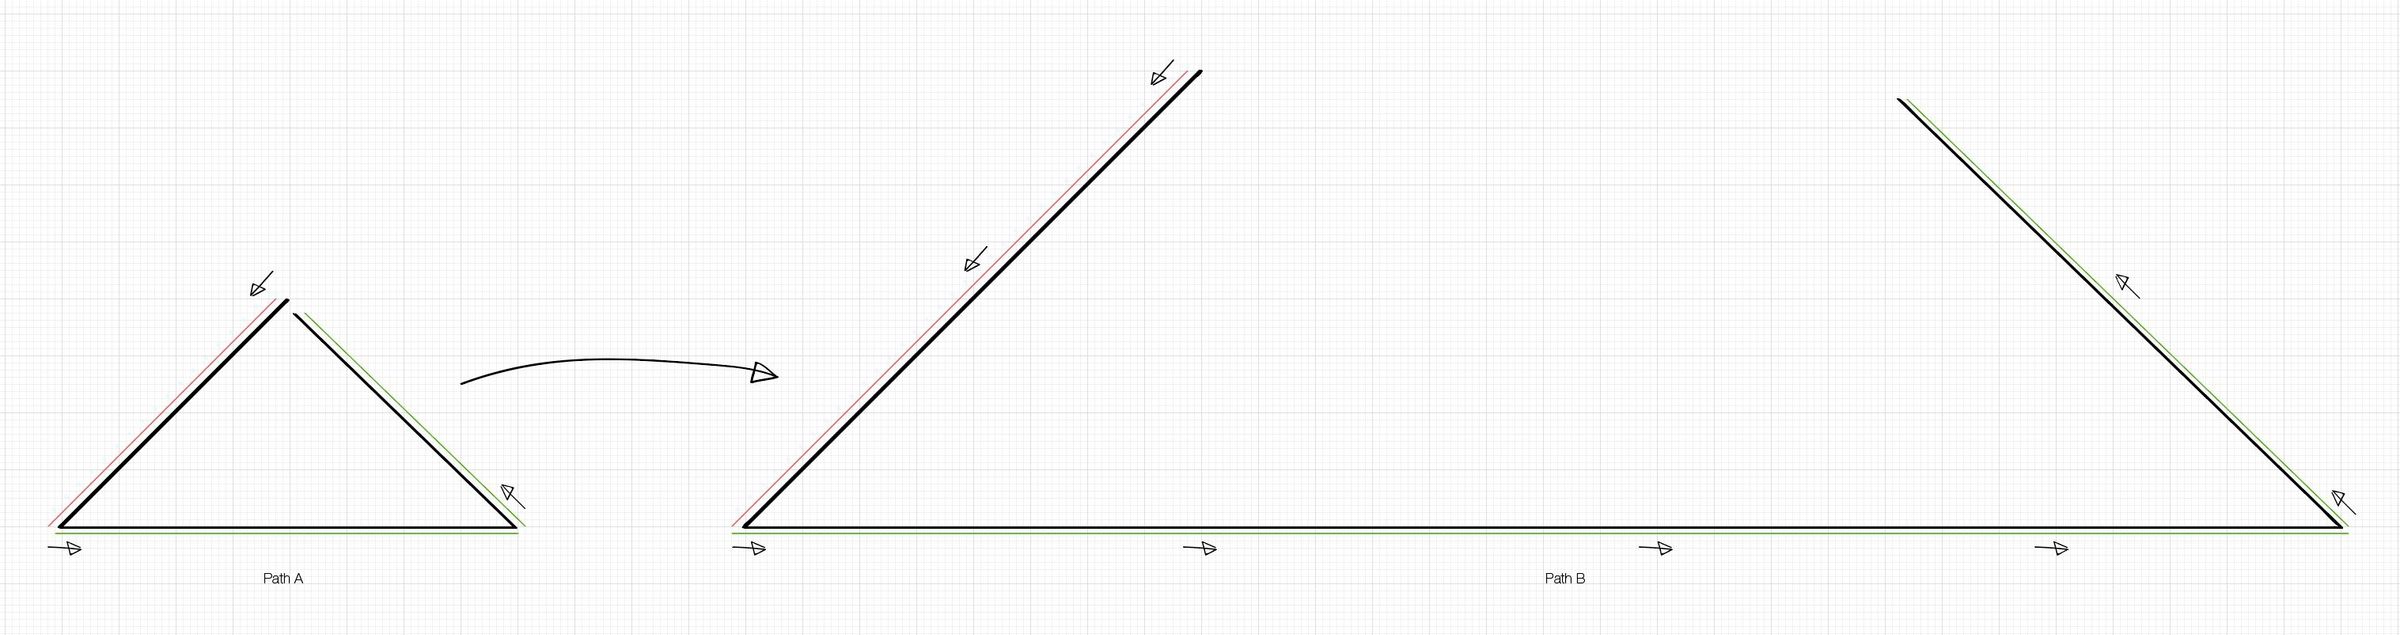
With this in mind we knew that the ideal scenario would be to draw a single shape that followed the car’s path, record the speed that the driver took through the path and have an output shape generated for us based on these two parameters. The resulting shape would then be taken into our landscape generation setup.
The best way to achieve this was to use Houdini, making use of its procedural workflow and terrain tools. The shape of our entire scene could be dictated by the shape of a single curve object (Path A). Meaning we would be able to iterate and test options quickly and efficiently.
With the help of frequent collaborator, big brain and all-round nice guy Dave Ferner at Real Good Liars, we were able to create a rig that would allow us to draw the path that the driver had taken, set a controllable speed multiplier and then have this rig generate the correct output path as a new curve object.
To complete the rig we were able to use this same setup to generate an animated camera that would align itself to our output curve and move along its path at the correct speed and duration to match the incoming data of the car. As long as the drivers were able to repeat what they had done for the footage we were working from, everything would be able to stay very tightly in sync.
Procedural Roads & Heightfields
Once we had our outgoing curve generated by our rig it would be used for two purposes. The first would be to create our road geometry. We built a simple setup that would take any incoming curve, extrude along its length and then apply a controllable amount of subdivisions and randomness to its profile. Therefore we could quickly and easily update the shape our roads would take and if changes were made higher up in the process this would be automatically updated within our rig. The next step would be to take the generated road and use it as a way to mask where our landscape geometry was being created.
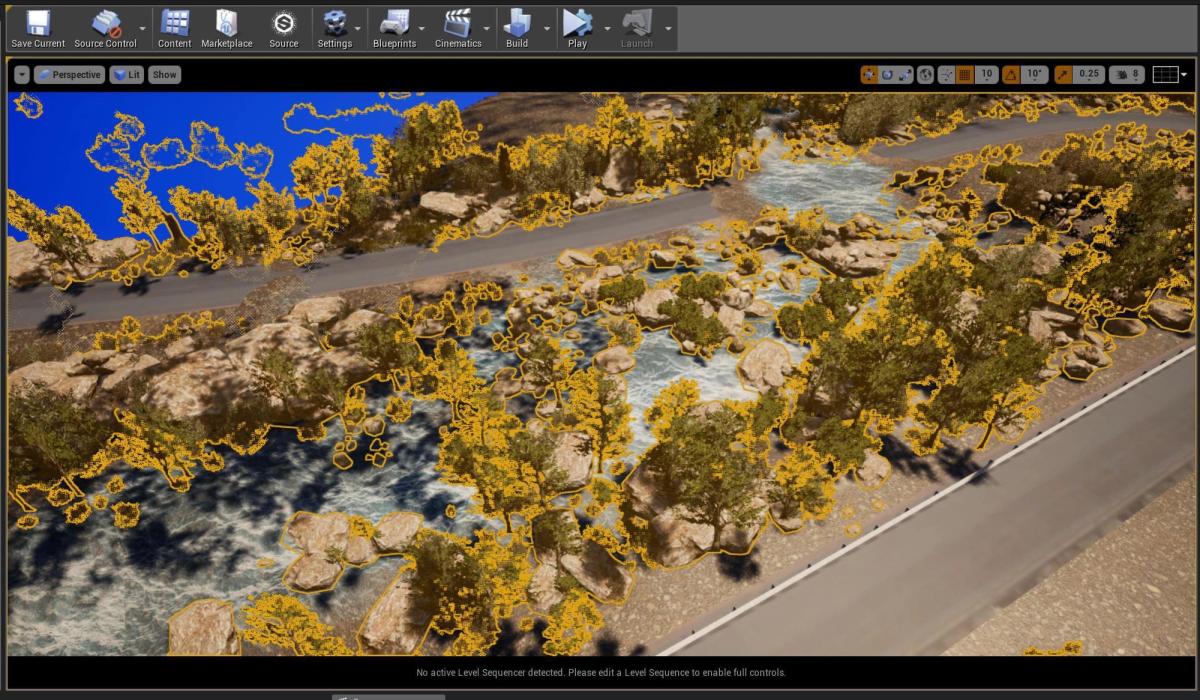
We made all the landscapes using Houdini’s Heightfield setup, which allows you to combine different types of noises across a large surface to displace geometry and create convincing looking terrains. The benefit of our process came from being able to import our generated roads and use them to create masks in the Heightfield. This would effectively tell Houdini not to displace any of the terrain where the road was meant to be, keeping our roads perfectly flat which was important for the projection mapping to work correctly.
Unreal Rendering
The final step in our process would be to leave the procedural world of Houdini and export our landscapes and animations to be finished in Unreal Engine. There were a number of advantages to incorporating Unreal into our workflow on this project. We were able to scatter massive amounts of foliage and other scenic objects throughout our landscapes with little-to-no slow down in performance. We were also able to adjust our scenes with incredible speed and ease. If we found that a rock or tree needed to be moved we could do this directly in the scene and easily see the results. Finally the rendering speed that Unreal was able to perform was incredible. We knew we didn’t need this to run as a real time project but the visual results combined with the output speed was truly awe inspiring as well as efficient.
Final Result
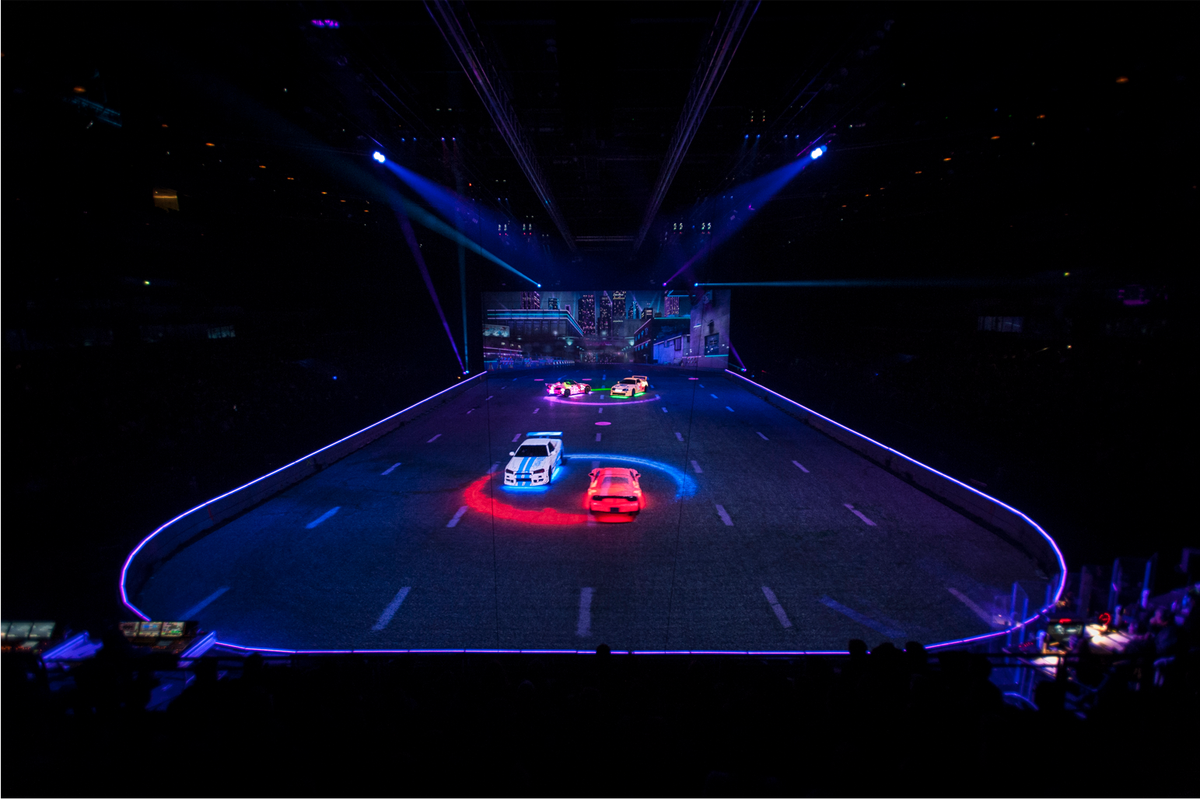
For the final result we transformed Ford Field stadium in Detroit by projecting onto the floor with 20 projectors, creating a dynamic backdrop for the Ford Explorer as it drove across quintessential landscapes in real time.
Read more about the project.


